Chocolate Hazelnut Milk

Sometimes, being dairy-free can feel limiting. I grew up drinking milk with every meal, and drinking chocolate milk with my school lunches was always my favorite. Once I realized dairy was one of the main reasons my stomach hurt, I simply had to cut it out. But that doesn’t mean I didn’t miss it! Lucky for me, playing in the kitchen is literally my favorite thing in the whole world. It makes me happy, destresses me when I have a bad day and feels super rewarding when someone enjoys my one of my treats. In any case, this Chocolate Hazelnut Milk was created out of nessesity. I was craving something chocolaty, rich and smooth and, after 3 attempts, I nailed this recipe!

Check out how easy it is to make this recipe on your own.


Chocolate Hazelnut Milk
Print Recipe
Servings Prep Time
2 servings 5 minutes
Passive Time
2 hours
Servings Prep Time
2 servings 5 minutes
Passive Time
2 hours
Chocolate Hazelnut Milk
Print Recipe
Servings Prep Time
2 servings 5 minutes
Passive Time
2 hours
Servings Prep Time
2 servings 5 minutes
Passive Time
2 hours
Ingredients
Servings: servings
Instructions
  1. Place all ingredients in a blender and blend for 60-90 seconds. Strain through a nut milk bag. Store in airtight mason jar.
Recipe Notes

Helpful Hints:

Add an additional teaspoon on cacao powder if you really love chocolate.

Share this Recipe

Easy No Bake Nectarine Cobbler

raw nectarine cobbler

This may not be a big shocker, but I really like fruit. Like if I had to pick one food group to eat for the rest of my life, fruit would be it!! I love everything about fruit — its natural sweetness, its juiciness… I mean, what’s not to love?! Now if I had to pick a favorite fruit, that’d be a bit harder…
Anyways, about two weeks ago, I finally had time to go to a local produce store in San Diego that I had been meaning to go to for months now. It’s called Specialty Produce and I’d heard amazing things about it. They supply the produce to local restaurants in San Diego and even better, they only sell food from California, meaning this produce is crazy fresh!

stone fruit

When I arrived, I wasn’t exactly sure what to expect as it is not your typical grocery store. It is this massive warehouse, nothing very special to look at, but what it lacks in appearance, it makes up for in quality! My first goal — go directly to the cooler. Why? Well, because I saw that they promoted purple raspberries, and there was no way I was going to leave this place without trying one! But, when I got there, I saw sooo much more!

If you were to ask my husband about this trip, he’d say I was like a little kid in a candy store! There was so much fruit, and some that I had never even seen before! Lucky for me, the nicest guy working there clearly saw I was excited, possibly even overwhelmed honestly, and came to the rescue. He started off my fruit exploration experience by asking what I enjoy the most, and then took it one step further and asked if I preferred tart versus sweet fruit. Because I couldn’t narrow it down, he let me sample all the different varieties of fruits (who knew there were so many differing flavors?!), but I was unaware he was saving the best for last! We starting off with fruits a little more tart, like the purple raspberries and bush berries, then moved onto fruits a little sweeter, such as the blueberries, strawberries and peaches. But that last fruit… white nectarines. I mean, I love nectarines, but on my list of favorite fruits, it’s just average. Until he sliced me a piece. Now, if you can imagine fireworks going off in your mouth from a pure sweet bliss, that is exactly what was happening to me! I knew right then and there I was going to buy a ton of these bad boys and whip up a special dessert!

And there you have it — the White Nectarine Cobbler. Now it is time to go enjoy my new  favorite dessert, before my husband finishes it all! 🙂
cobbler
Nectarine Cobbler
Print Recipe
I LOVE this time of the year! The sun is shining, the birds are chirping and stone fruits are finally in season! This is the perfect time of year to enjoy peaches, nectarines, plum, apricots and cherries. My favorite part of this season is making an already amazing fruit even better by jazzing it up with other whole and healthy ingredients. This week I was inspired to to make a white nectarine cobbler!
Servings Prep Time
6 servings 10 minutes
Passive Time
3 hours let set in fridge
Servings Prep Time
6 servings 10 minutes
Passive Time
3 hours let set in fridge
Ingredients
Fruit Base
Crumble
Servings: servings
Instructions
Fruit Base
  1. Peel ripe nectarines and cut into slices. Sprinkle with vanilla lemon juice, coconut oil and cinnamon. Gently mix by hand and place in to 8x8 pan.
Crumble
  1. Place pecans, dates, salt and cinnamon into food processor and blend for 1 minutes. Sprinkle over Fruit Filling.
Recipe Notes
To find the perfect nectarine:
1. Look for a medium-sized fruit. Gigantic nectarines will be a little grainy or mealy, and the really small ones tend to be tart and generally picked before fully ripening.
2. Look for a soft, sweet-smelling fruit. Buy them when they are still somewhat firm (not rock hard), but almost a little soft to the touch. This will ensure that they will be ready in one to two days if left out on your counter. Now, you may look a little silly, but smell your fruit! It should have a light, sweet fragrance.
3. Ask some in produce or at the farmer’s market to try a sample. Not only will it guarantee you a great batch, but the people working may teach you even more tricks to ensuring a great fruit every time!
Share this Recipe

ADVANCED BOOK SIGNING OF SWEETS IN THE RAW: NATURALLY HEALTHY DESSERT COOKBOOK!

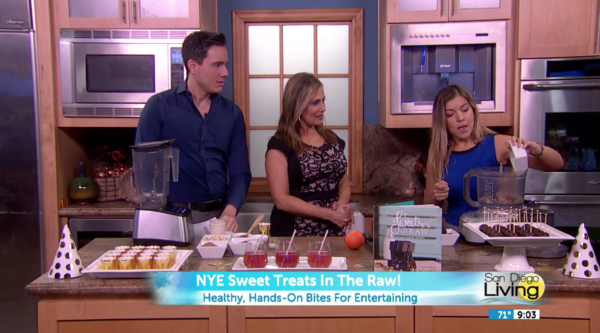
The day is almost here, the day of my very first book signing. Two years ago, when I first decided I was going to create a healthy dessert cookbook without refined sugars, I had no idea the journey it would take me on. My goal at the time was pretty simple: create a couple dozen healthy and delicious dessert alternatives for my friends, family and clients and put it into a cute cookbook… Easy enough, right?
In the industry of healthy and fitness, there is a lot of time and energy put into the next big fad and way too much time spent telling everyone what they can’t have and very little on what you can have. After taking the time to learn and understand what highly processed foods and sugars do to the body, I began some R&D into the healthiest desserts I knew of at the time — vegan desserts. Unfortunately, I found that many of these desserts were using highly processed ingredients. I then turned to raw desserts and, although the basic concept was amazing — simple, no baking required, all whole ingredients — they still weren’t actually healthy. Most of recipes I found were loaded with so much refined sugar (the kind that makes your blood sugar go sky high) that it completely cancelled out the benefits of the whole foods they were being paired with!  Lucky for me, I came across a few bloggers, chefs and cooks who showed me how to use whole ingredients in a new way!  People like: Susan Powers of rawmazing.com, Angela Liddon of ohsheglows.com, Megan Gilmore of detoxinista.com, Heather Pace of sweetlyraw.com, Laura-Jane The Rawtarian at therawtarian.com and Ella Leché of pureella.comNow all of these beautiful ladies don’t necessarily just make desserts or exclusively use unrefined ingredients. But, thanks to them, I was truly inspired to start using natural sugars in completely new ways. After learning that skill, the recipe crafting process came quite easily, after all, I did grow up in a kitchen with a mom making homemade desserts on the daily! Months of playing in the kitchen and 46 recipes later, I now have what is the very first raw, vegan family & kid-friendly dessert cookbook made with no refined sugars or processed ingredients – Sweets In The Raw: Naturally Healthy Desserts! 

Book Cover for "Sweets in the raw - Naturally Healthy Desserts" by Laura Marquis

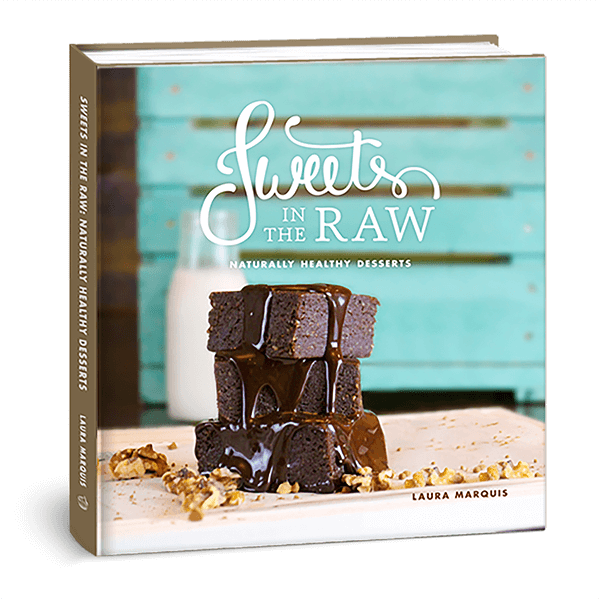
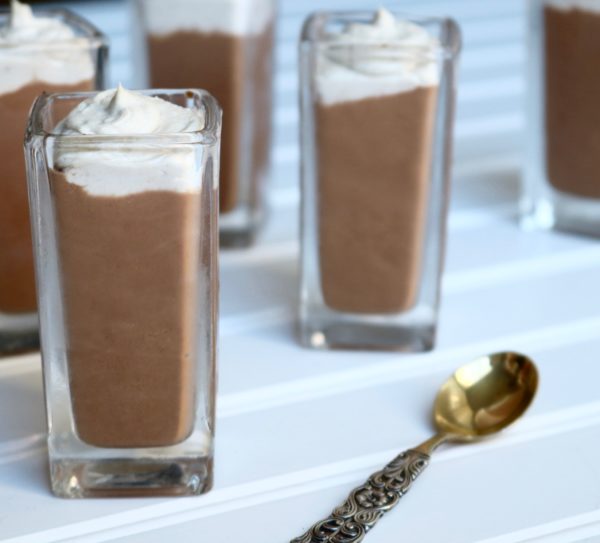
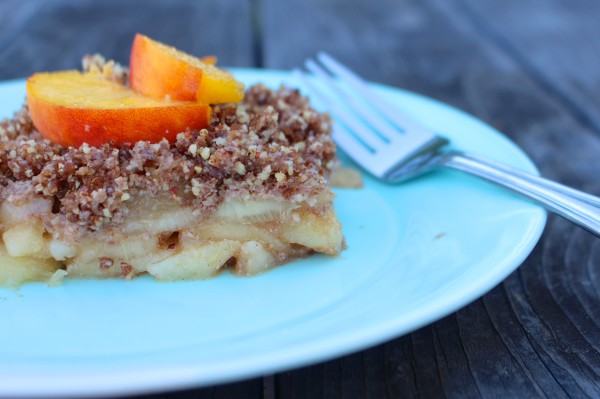
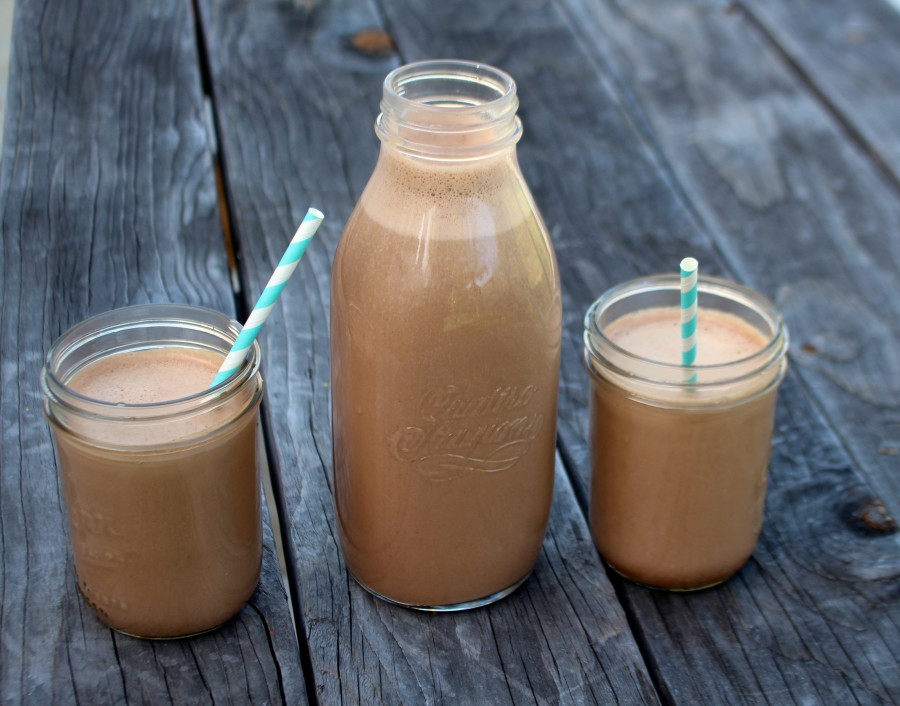
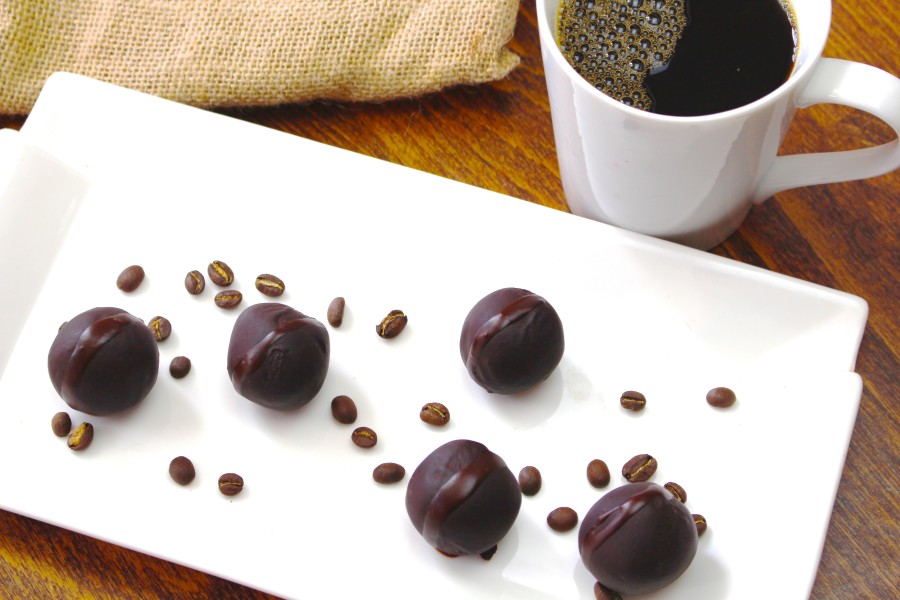
So what can you expect in this book? Simple, beautiful, easy-to-make desserts with fresh whole ingredients. The recipe chapters are organized by dessert type so there is a chapter for: Bars, Bites & Cookies, Cakes & Tarts, Candies, Fudge & Truffles and Frozen Treats, Ice Cream & Sorbets so that when your sweet tooth hits, you can easily find a recipe to satisfy it. There are even handy icons at the top of every recipe page to let you know exactly how long each recipe should take with a Soak Time, Prep Time and Freeze Time symbol. I have even added a whole section about the most important things to know about eating healthy sugars so that you have less confusion with this sweet and sticky subject.
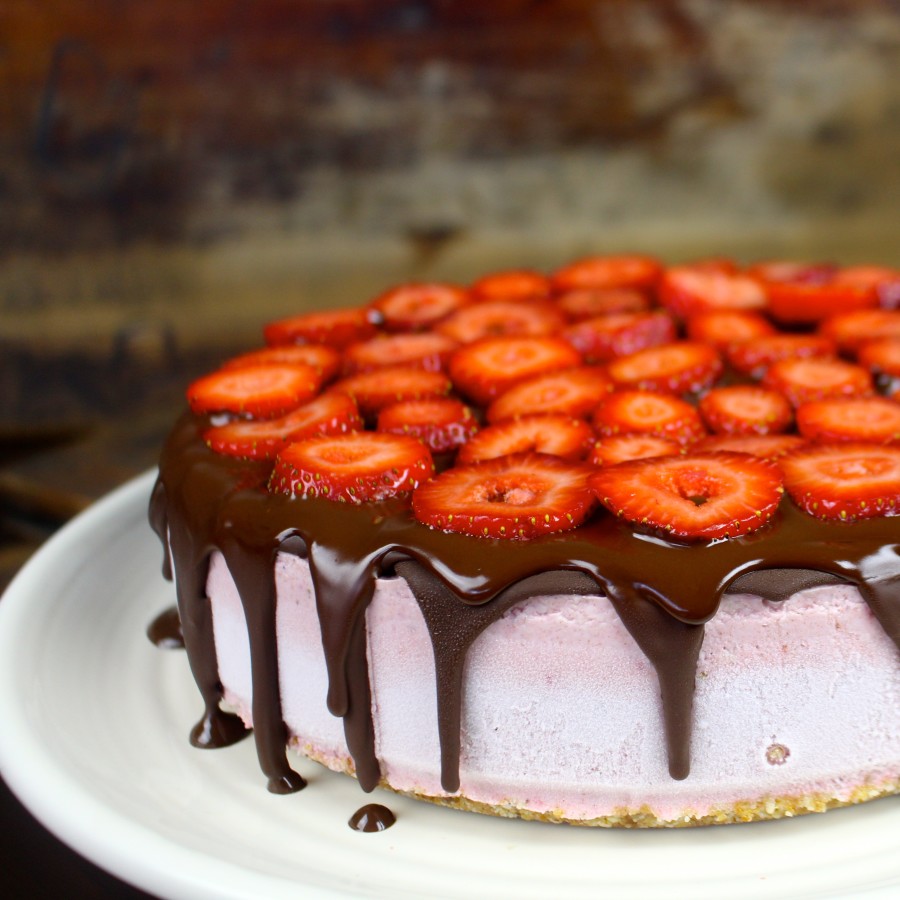
To think that this Saturday I will be hosting my very first book signing for the people who inspired it all is so surreal! I have been able to accomplish so much in such a short period of time, all thanks to your love and support! I hope that this book not only gives you delicious recipes (Strawberry Cheesecake and Raspberry Sorbet are my favorites!), but also gives you some inspiration to play around in your own kitchen.
To get your hands on this Pre-Release, be sure to RSVP to the event. If you are unable to make it this time around, the book will be nationally released in September, and you can expect a large book tour when it comes. Thank you for all the help during this journey!

Vegan Chocolate Milk

healthy-chocolate-milk-vegan

Is there a single kid out there who didn’t want to upgrade their traditional school milk for chocolate milk?  If you weren’t deemed lactose intolerant, milk was probably a staple in your childhood diet. For most of us, it was milk in our breakfast cereal, a carton with our school lunch and finally, a big glass of milk with dinner. Unfortunately for me, I have been lactose intolerant for as long as I can remember. And I am not the only one. About 1/3 of Americans are as well.  In addition, milk has been in the hot seat the past few years with questions about how healthy it really is. So what is a health-conscious girl like me supposed to do? Create something that tastes even better of course, with no gray areas! That’s right — Chocolate Milk is getting a Naturally Healthy makeover!

healthy-vegan-chocolate-milk

Now, I created this chocolate milk recipe for my little 3 year old nephew. My twin sister and brother-in-law are trying very hard to ensure that he eats healthy, but in a world where every restaurant wants to serve your kid juice or chocolate milk, it can be hard. They win some battles and lose others, but now, he can have “chocolate milk” whenever he comes to visit Auntie Laura!  Plus, I added a little touch of yacon syrup to the recipe. So, not only is he getting something delicious with no refined sugar or fake ingredients, but he is also getting some prebiotics which are great for his tummy and mine, too!

*This recipe was originally featured on Blendtec 4/20/16. http://www.blendtec.com/recipes/vegan-chocolate-milk

Vegan Chocolate Milk
Print Recipe
Servings Prep Time
4 servings 5 minutes
Passive Time
2 hours
Servings Prep Time
4 servings 5 minutes
Passive Time
2 hours
Vegan Chocolate Milk
Print Recipe
Servings Prep Time
4 servings 5 minutes
Passive Time
2 hours
Servings Prep Time
4 servings 5 minutes
Passive Time
2 hours
Ingredients
Servings: servings
Instructions
  1. Place all ingredients (excluding yacon syrup) in a blender and blend for 2 minutes. Add yacon and pulse 2-4 times until well blended. Serve and enjoy immediately of seal in an airtight mason jar in the refrigerator for up to 7 days.
Recipe Notes

Helpful Hint: If you don't accidentally drink all of the chocolate milk as soon as you finish it, note that it is completely normal for the milk to separate slightly. Simply shake before serving. 

Share this Recipe

Espresso Truffles

Just the thought of espresso and chocolate puts a smile on my face! Now that I have merged them both into a truffle…watch out world! It is the perfect treat to complement a cup of coffee for breakfast or to satisfy your sweet tooth at the end of a long day!

Coffee-Chocolate-Truffles


Espresso Truffles
Print Recipe
Servings Prep Time
18-24 truffles 15 minutes
Passive Time
10 minutes chill time
Servings Prep Time
18-24 truffles 15 minutes
Passive Time
10 minutes chill time
Espresso Truffles
Print Recipe
Servings Prep Time
18-24 truffles 15 minutes
Passive Time
10 minutes chill time
Servings Prep Time
18-24 truffles 15 minutes
Passive Time
10 minutes chill time
Ingredients
CHOCOLATE
Servings: truffles
Instructions
TRUFFLE DIRECTIONS
  1. Process all dry ingredients together until flour-like in consistency in the food processor. Add pitted dates and process until the mixture is an even, crumbly consistency. Add the remaining ingredients and process until the dough turns into ball. Roll the dough into 1 inch balls, place on plate and put into the refrigerator while making the chocolate coating.
CHOCOLATE DIRECTIONS
  1. Mix all wet ingredients together in a small mixing bowl. Add cacao powder and whisk until well blended. Dip truffles base into the chocolate with a fork and place onto cookie sheet lined with parchment paper. Place in the refrigerator for 10 minutes, serve and enjoy. Extras can be stored in the refrigerator for up to 1 week.
Recipe Notes

Helpful Hint: I used to top these delicious balls of yumminess with a whole coffee bean, but I found people were trying to eat them. I now garnish the truffles with ground coffee and then sprinkle coffee beans on the plate for presentation.

Share this Recipe

Strawberry Cheesecake

If you are looking for crowd-pleasing Valentines’s Day dessert then look no further! This vegan strawberry cheesecake is all you will need! It is fresh, light and creamy!

strawberry-cheesecake

Strawberry Cheesecake
Print Recipe
Servings Prep Time
12 mini cheesecakes 15 minute prep time
Passive Time
4 hour freeze time
Servings Prep Time
12 mini cheesecakes 15 minute prep time
Passive Time
4 hour freeze time
Strawberry Cheesecake
Print Recipe
Servings Prep Time
12 mini cheesecakes 15 minute prep time
Passive Time
4 hour freeze time
Servings Prep Time
12 mini cheesecakes 15 minute prep time
Passive Time
4 hour freeze time
Ingredients
CRUST
CHEESECAKE FILLING
Servings: mini cheesecakes
Instructions
CRUST DIRECTIONS
  1. Process all ingredients until graham cracker-like consistency in the food processor. Firmly press crust mixture into the base of 2 small springform or 12 mini molds. Set aside.
CHEESECAKE FILLING DIRECTIONS
  1. Process all ingredients except for strawberries and cherries until even blended. Add remaining fruit until smooth, even consistency in the food processor. Evenly spread filling onto base. Set aside in freezer.
Recipe Notes

Helpful Hint: If you are unable to use fresh fruit, be sure to fully thaw your strawberries before adding them into the filling; otherwise the coconut oil will harden up and create a chunky looking texture.

Share this Recipe